Not quite what I usually post and oddly specific, here is a PersonalJava tutorial to help people getting started with developing Java applications for old Handhelds.
What do you do when you want to create applications for Handheld PCs? There is a variety of options including the Windows CE SDK, Visual Basic, PocketC and others. Usually they require an understanding of the Windows CE API. There is another, often overlooked piece of software that is PersonalJava, an almost full implementation of the Java 1.1.8 standard for Windows CE 2.11 and 3.0, released by Sun in 1999.
The purpose of this article is to show how easy it is to develop Java applications for your Handheld.
What you need:
Get started by creating a new project in Eclipse.

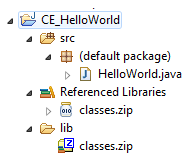
Now we need the archive with the PersonalJava classes. While you could also use the library of the JRE you’re using, Eclipse won’t tell you which classes are not available in Java 1.1, so using the actual library makes it much easier.
Locate the classes.zip file on your Handheld PC after installing PersonalJava, create a /lib/ folder in your Java project and copy the zip there.

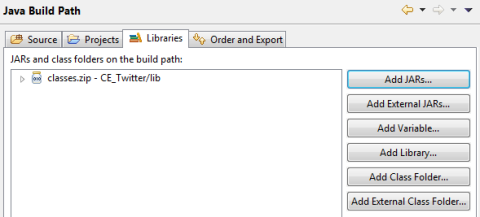
Right-click on your Project, click Properties and navigate to Java Build Path – Libraries. First, remove the rt.jar as we won’t need it. Then click “Add JARs†and add classes.zip

Now, what is missing is the JavaDoc which helps a lot with developing. Eclipse automatically integrates the JavaDoc into the user interface, but requires the doc to use a specific formatting standard. A workaround is using a JavaDoc from a newer version of Java, which might include some wrong information about deprecated methods, but – since Java is backwards-compatible – should include all the information you need.
To do this, right click on “classes.zip†in your Referenced Libraries project folder, click Properties, and under JavaDoc location, point it to the folder that contains the JavaDoc (I used http://www.cs.xu.edu/jdk1.3.1doc/ as 1.3 seems to be the first version to have a format that works with Eclipse)
Create a new Class and call it HelloWorld.java, then our project is all set up now and we’re ready to start coding!

Here is a short example code:
import java.awt.BorderLayout;

import java.awt.Frame;

import java.awt.Label;

import java.awt.event.WindowAdapter;

import java.awt.event.WindowEvent;

class HelloWorld extends Frame {
private static final long serialVersionUID = 1L;
    HelloWorld(){
        super("Hello World");
        setLayout(new BorderLayout());
        add(new Label("Wow!"), "Center");
        setSize(320, 200);
        addWindowListener(new WindowAdapter() {
            public void windowClosing(WindowEvent windowevent) {
                System.exit(0);
            }
        });
        show();
    }
    public static void main(String args[]) {
        new HelloWorld();
    }
}
To compile and run the application, navigate to Run – Run configurations, double click “Java Application†and click Run.

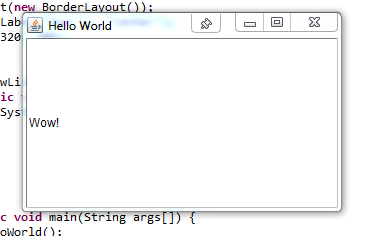
Here’s how it looks on Windows 7:

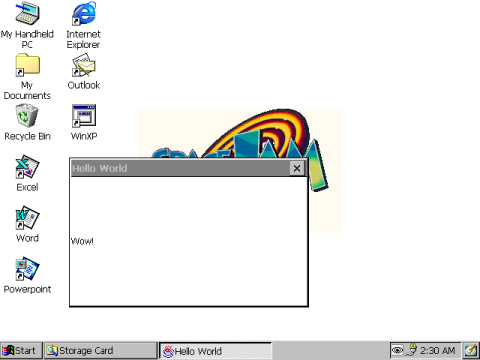
To run it on your HPC, simply copy all class files from the /bin/ folder of your project to your HPC, then start HelloWorld.class

Happy coding!
???? ??? ???? – ???? ??????, ?????? ?????? goldcoders